Add a Trigger
Triggers can be added from either the Main View or the Side View.
The operation steps are the same across the Date, Holiday, Day of Week, and Default views.
In this section, the Date view is used as an example.
Selecting a Column
Before adding a Trigger, select the target column for the date (or day of the week).
A column becomes selected when you click anywhere inside it.
For details on selecting a column, refer to “Selecting a Column” in Add a Schedule.
Adding a Trigger
After selecting a column, choose
[File] » [Add Trigger...]
from the menu.
Alternatively, you can right‑click the column and select
[Add Trigger...] from the context menu.
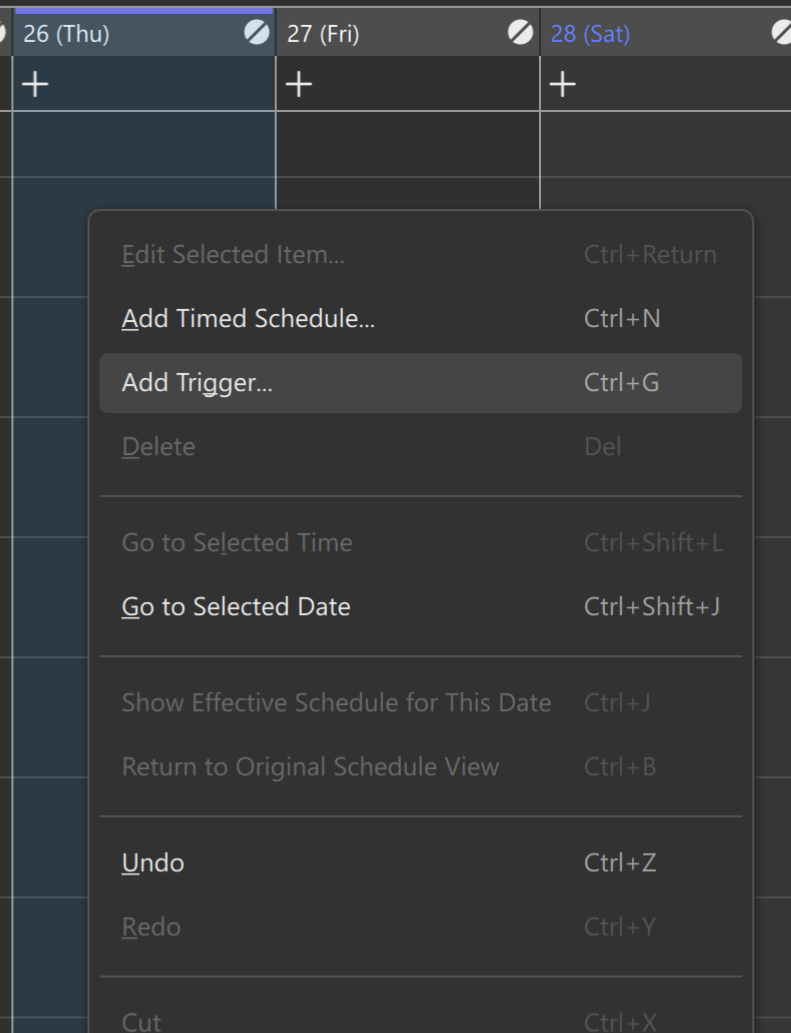
A new Trigger is added, and a dialog box appears where you can configure the time and other settings.
The time corresponding to the position you clicked in the column is automatically set.
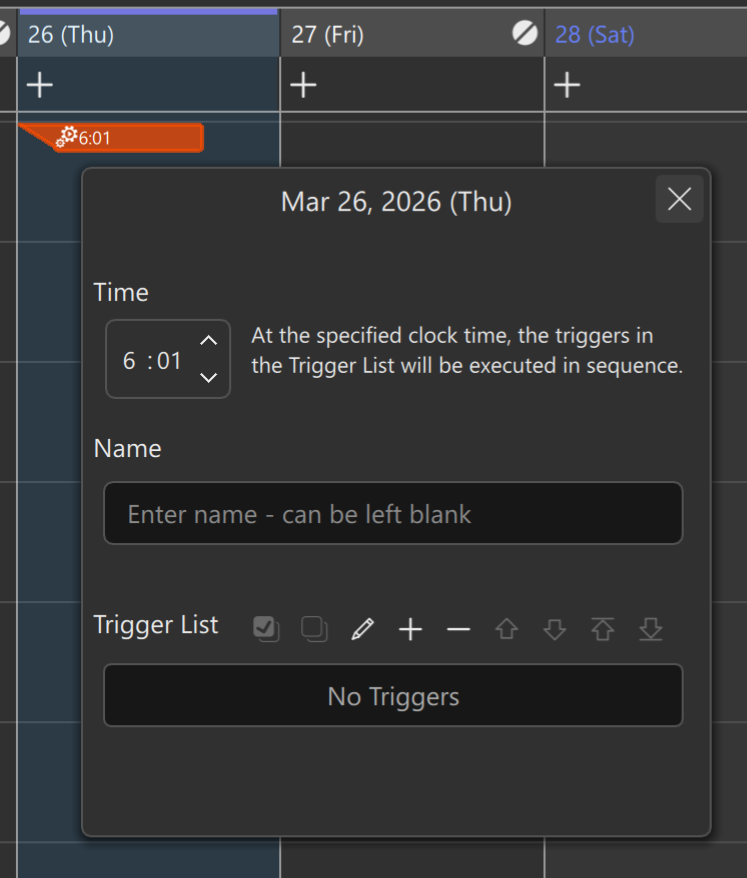
Upper‑Right Icon
After a Trigger is added, the icon in the upper‑right corner of the column (26th in Figure 2) disappears.
This indicates that the date is now active.
This icon is hidden whenever at least one Schedule or Trigger is set for that date.
Trigger Dialog Box
The Trigger dialog box allows you to configure the following items:
Time Required
Specify the time when this Trigger will run. Click thehourorminutefields to enter values directly, or use the icons on the right to adjust the values.Name Optional
You can assign a name to this Trigger.
The name appears in both the Main View and the Side View.Trigger List Required
Specify the actions that will run at the selected time.
By default, the list is empty, which means nothing will be executed.
To add an item, click the icon.
For details, see “Add to Trigger List” below.
Add to Trigger List
When you click the icon in the Trigger dialog box, the New Trigger Item dialog box appears.
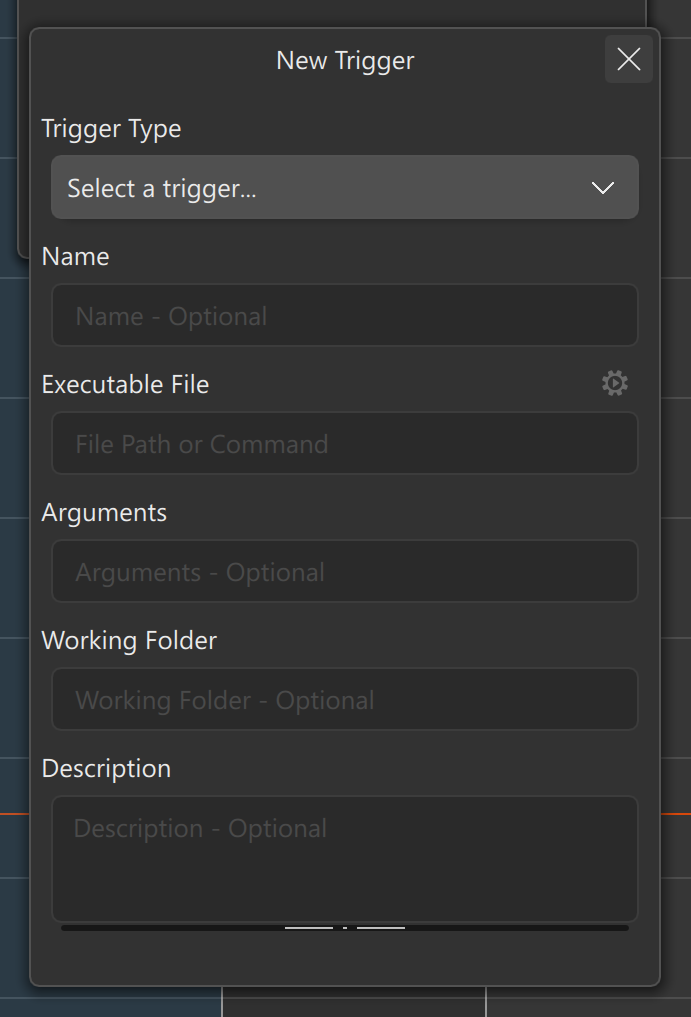
In the New Trigger Item dialog box, you can configure the following items:
Trigger Type Required
Select one of the predefined types, or chooseCustom Triggerto configure your own.
The following options are available:Shutdown
Shuts down the PC.Restart
Restarts the PC.Hibernate(Windows) /Sleep(macOS)
Puts the PC into hibernation or sleep mode.
The behavior differs between Windows and macOS.Custom Trigger
Select this option when specifying your own executable file.
Name Optional
Executable File Required
Arguments Optional
Working Folder Optional
Description Optional
Example: Adding a Shutdown Trigger
Because Shutdown is a built‑in option, you can select it directly from the Trigger Type list.
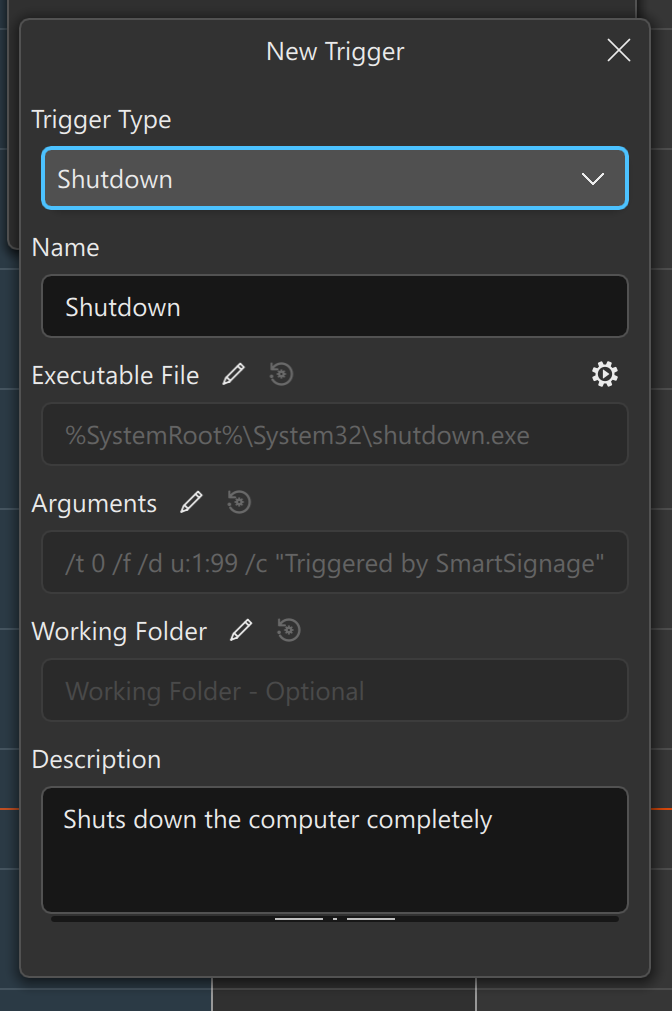
When you select Shutdown from the Trigger Type list, the fields are automatically populated as shown in Figure 4.
For Shutdown, the executable is set to shutdown.exe on Windows and shutdown on macOS.
The required arguments differ depending on the operating system.
You can modify Executable File, Arguments, and Working Folder by clicking the
button.
If you want to restore the default values after making changes, click the
button.
After configuring the settings, click the button to close the dialog.
Run
Click the button on the right side of Executable File to run the executable using the configured values.
In this example, because the Trigger is Shutdown, the PC will shut down.
Running on macOS
By default, macOS does not allow applications to execute /sbin/shutdown.
Additional configuration is required.
For details, refer to “macOS: How to Enable Shutdown Execution” in the Schedule section.
Once added to the Trigger List, the item appears as follows:
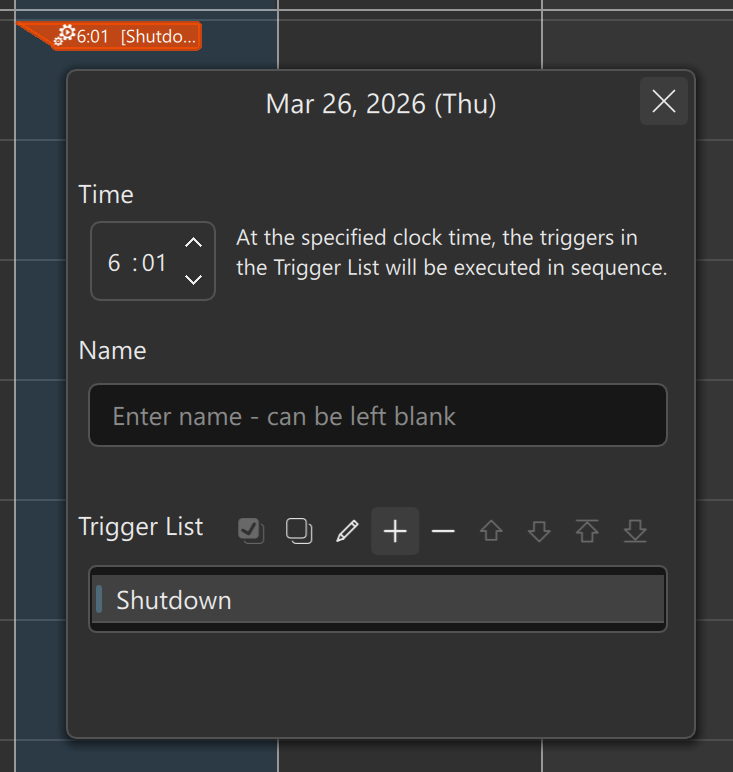
With the settings shown in Figure 5, the PC will shut down at 6:01.
You can add multiple Trigger Items to the list.
All items in the list are executed in order from top to bottom when the specified time is reached.
Icons in the Trigger List
The icons in the Trigger List provide the following functions:
- … Select all items
- … Deselect all items
- … Edit the selected item
- … Add a new item
- … Delete the selected item
- … Move the selected item up one position
- … Move the selected item down one position
- … Move the selected item to the top
- … Move the selected item to the bottom